Showing posts with label dye. Show all posts

1.26.2009

Gradient dyeing

Below are photos of some gradient dyeing that I started in a class in contemporary quilting I'm currently taking. I had hoped to do quite a bit more of this, but to date have not found the time. I'm especially interested in complementary colour-to-colour gradient dyeing (4) and exploring the different hues of brown which might be obtained. Eventually these fabrics will be used to make a small quilt for the class, Art Quilt Series, taught by Elaine Quehl, local quilt artist, teacher and dyer. Elaine is a generous teacher with a warm spirit who is passionate about her art. She currently teaches many great classes in and around Ontario so do check her out.

1.2.3

4.5.6
1. 100% cotton fat quarters batching overnight in Procion MX dyes in zip-loc bags hanging on a clothes drying rack.
2
& 3. Dyed fabric after a first rinse.
4. Golden yellow(G&S Dye 204)-to-purple (G&S 904) hue-to-hue gradation; 7 steps
5
. Soft brown (G&S 611) colour gradation ; 5 steps
6. Grey (G&S 701) colour gradation; 5 steps

7.07.2008

May TIF - Part II

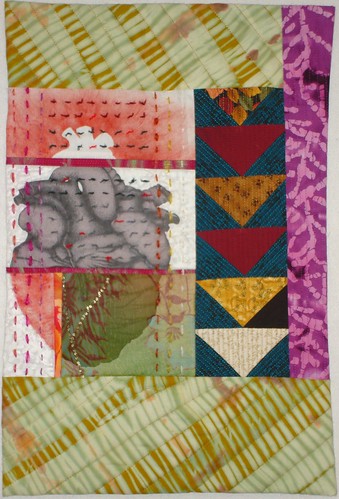
I tried a few new things with May's TIF piece: photo transfer paper, oil paint sticks and hand tyeing. The image of a heart was drawn by Jason Reid and used with permission. For more info about the concept read here.


mother_rotated

Mother
Hand dyed and commercial cottons;
Shiva paint sticks, photo transfer;
Machine pieced, hand and machine quilted,
hand tied;
14 x 20"
July 2008


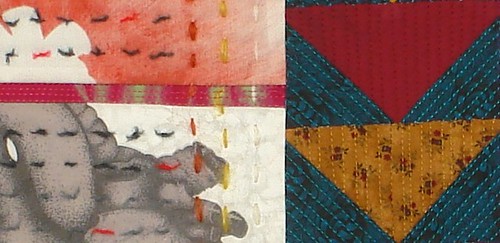
detail

Detail


Related post: May TIF - Part I

6.17.2008

Recent goings on

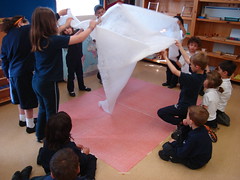
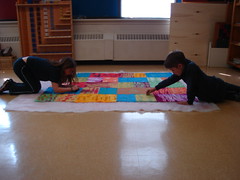
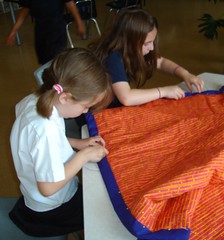
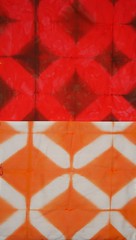
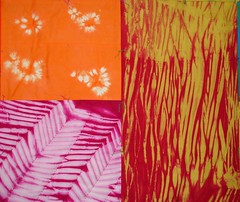
Earlier this year I posted about a project I was doing with my daughter's elementary school class. For several months we dyed cotton using Procion MX dyes, including stamping with print paste, clamping, tying, and stitch resist dyeing. In all, the children created seven meters of brightly coloured cotton fabric one fat eighth at a time. I was amazed at some of the pieces that they made and the experience reinforced my notion that most children come equipped with an innate sense of colour and composition. In late Spring we gathered all of the dyed fabric together and the students decided to make one large quilt using their hand dyed fabrics. We mostly tied the quilt, which was about as much as this age group could handle. Although it was tempting, I resisted adding a whole lot of machine quilting as I wanted the finished quilt to be predominantly their own work. Below are some photos showing them putting the quilt together.


DSC05614
Making the quilt sandwich
DSC05619
Basting the quilt

binding
Sewing on the binding.


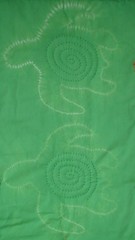
These are are some of my favourite blocks:

clamped turtle lattice


trio_1 trio_2


And the finished article, which is 57 x 72 inches:

finished


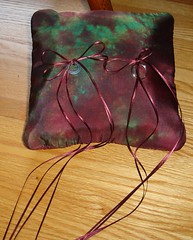
Besides finishing this project I've been busier than usual these past few weeks. Among other things there was my sister-in-law's 'big fat marathon wedding', which consisted of two tea ceremonies, a wedding in her home (what were they thinking?) and a huge reception in the evening. The poor girl was up at 5:30 in the morning on her wedding day to have her hair and make-up done in time for the first event of the morning. I swear, the person who thought of starting married life with a wedding was a true sadist. Below is a photo of my contribution to the gala affair: a small silk ring pillow that my sister-in-law requested I make in green and burgundy, a nice colour combination. She loves the look of low water immersion dyed fabric and I was happy to oblige. Note the classy rings.

DSC05436_cropped


A word about my participation in the Take if Further Challenge that SharonB is running this year. I have been away from the challenge goings on for most of last month and into this month. To be more precise, life got hectic and I've been away from the computer. I've started working on a large-ish quilt, based on May's concept and plan to have it finished by mid July. I know that doesn't really fit in with how Sharon is running the challenge so I hope that she'll humour me. I plan to manipulate and use a few digitized images of drawings that I've made recently in a drawing class, juxtapose these with other images and collage them together into a quilt which will address the question posed by May's concept: "What do you call yourself and why?" I'll post regular reports on my progress and in August I'll go back to working on smaller works for the monthly challenges again. In the meantime have a look at the challenge concept for June as well as some of the work that's being made [link][link].

I also want to state that I've decided to enter a few pieces into a juried exhibit. It's a biennial show called Fibreworks put on by Cambridge Galleries of Cambridge, Ontario. I have never entered work in a show, and for that matter, have never exhibited work anywhere. I have been told that Fibreworks is a cutting edge exhibition populated mostly with the work of very accomplished artists and for this reason I will be surprised if one of my pieces is juried into the show. However, I am looking forward to the experience. As a quilt artist and friend said when I told her I wanted to enter some pieces, "You have to start somewhere."

4.02.2008

Quilt finished

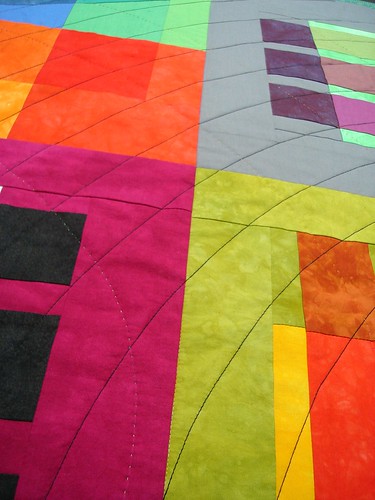
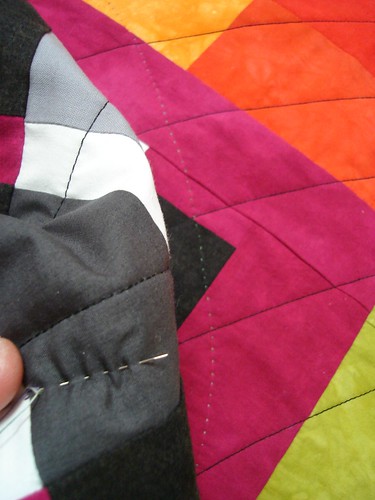
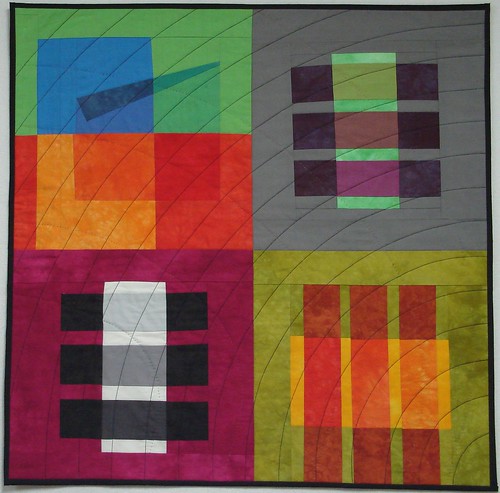
I posted about this quilt early last year when I started putting it together. The design was inspired by a colour exercise in a book I was reading called The Interaction of Color by Joseph Albers. In the meantime, the finished quilt top has been hanging on my design wall where I have enjoyed looking at its brightly coloured squares while deciding what to do about the quilting. Last week I got to it.

First I machine quilted black
concentric circles offset from
the lower right-hand corner
and hand quilted quarter ovals
starting from the lower left-hand corner
which intersected the black circular
stitching,


then added a narrow black binding.


Colour study: The illusion of transparency
Hand dyed cottons, machine pieced,
machine and hand quilted
29 x 29"
March 2008


Detail

1.23.2008

Shibori Girl's Pay it forward exchange

You probably already know Shibori Girl a.k.a. Glennis Dolce, who is among other things, a talented shibori artist and photographer. In October 2007, Glennis posted her own personal twist on Pay it forward and I gladly jumped at the opportunity to participate. Glennis promised to make a handmade gift for anyone who went out and taught some kind of art to children. To fulfill my commitment I began teaching fabric dyeing in my daughter's elementary school classroom. I have been there several times now and the teacher has asked me to continue teaching there every second Monday morning until the end of the school year. Below is a slide show of some things that we have done so far. The students have shown a real enthusiasm for fabric dyeing and I am quite happy about the way things are going. Toward the end of the school year I hope to gather all of the dyed fabric together and make one large quilt or smaller individual quilts using the fabric the students will have created.

Today on her recently created blog Elementary Art Exploration Glennis wrote that she is mailing her handmade gifts today, so I thought it would be a good time to report on what we've been up to in the classroom. The flickr slideshow below was made using Paul Stamatiou's HOW TO Quickie:Embedded Flickr Slideshows.

In the classroom: Clamped resist, arashi shibori and fabric stamping

11.29.2007

"There is little I cannot say with a textile of some kind."

"I have chosen to work in textiles because for me they provide a breadth and flexibility of expression which make all other materials seem limited by comparison. They combine the texture and relief qualities of sculpture or pottery, the color range of paint, and the literal expressive potential of photography. There is little I cannot say effectively with a textile of some kind." - Susan Brandeis

10.25.2007

Maki-age challenge

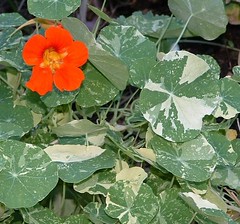
For the Maki-age Shibori challenge that Karren Brito of ENTWINEMENTS posted for the month of October, I decided that the effect I wanted to try to reproduce was the green and white pattern seen on variegated nasturtium leaves and shown in this photo.

variegatedNasturtiumsLeaf


The finished piece is at the end of the post, or check out photos of all the finished pieces posted so far in the Maki-age Shibori Challenge flickr pool. Here is a brief description of what I did.

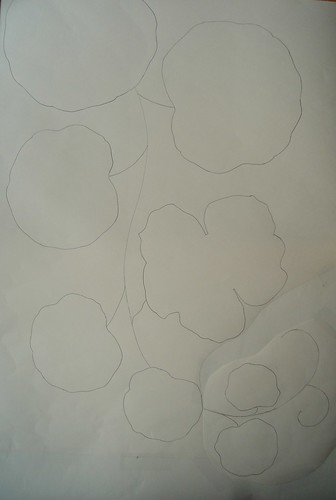
sketchThis sketch of a nasturtium vine was transferred to an 18 x 24 inch piece of white 8 mommie silk.
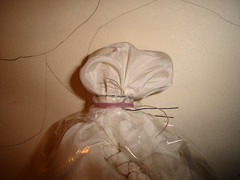
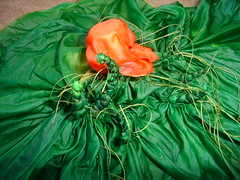
DSC04106To get the suggestion of an orange nasturtium flower I stitched and tied the leaves, capped these, and died the orange flower first, which was tied around a cork.
DSC04105The plastic cap was then turned inside out so that the orange flower was capped. The previously capped white silk was then died green.
DSC04111Leftover Procion MX dye stocks were diluted in 50% white vinegar to dye silk.

This is the tied silk after dyeing.
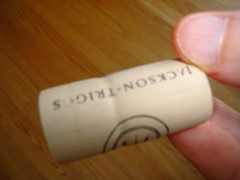
DSC04116This is the cork used to cap the orange flower with the depression showing where the silk was bound to the cork.

D2SC04125

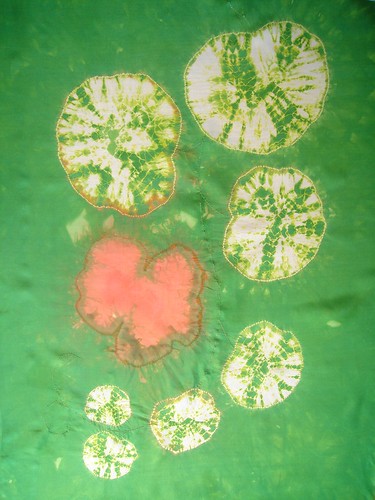
Maki-agi shibori
"Nasturtium"
8 mommie China silk
18 x 28 inches
Procion MX dyes

Some orange and green dye leaked around the plastic cap
in both directions but is mostly visible in the inside edge of
the orange flower. I originally wanted to over-dye the background
but at this point I think that I would probably make a mess of
the leaves. I may quilt this piece of silk and use embroidery
to mask the green dye that has bled into the borders of
the orange flower.

DSC04124
Detail


8.07.2007

The journey to black


"Brown is just a waystation on the journey to black" -Carol Soderlund
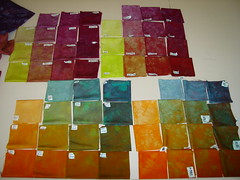
I came home last Saturday exhausted after five days at Quilting by the Lake in Morrisville, NY, USA. I learned a bunch of new stuff in the dyeing class that I took there with Carol Soderlund. Pictured above are the 2D hue to hue gradation matrices dyed by some of the class participants. Neither the class nor the week was much like what I had been expecting, not necessarily a bad thing. It was intense, and I was in overload mode for a good part of the time. A highlight of the week was touring the classrooms and seeing what other workshop participants were doing. I did dye a bunch of fabric and will post pictures of that some other time. For now I'm putting together the class supplies for a workshop I'm taking this weekend called Exploring the Surface: An Integrated Approach with Judith Trager. I am more than a little pleased that the class supply list includes acrylic paint and media. After this weekend though I think I'll be all "workshopped-out" for a while.

7.15.2007

KoolAid dyeing with yarn

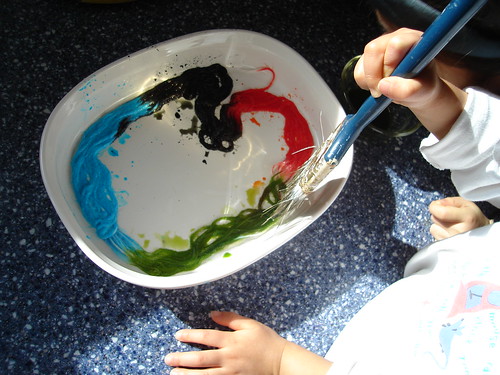
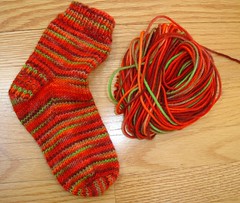
Kristi Porter wrote a good tutorial on dyeing yarn with KoolAid at knitty.com. I had seen a lot of this in my blog travels and thought it would be fun to try with my kids. It was tons of fun but it really got me wondering about the KoolAid, which in my hands behaved like some kind of industrial grade dye. So, obviously not the best stuff to be drinking.

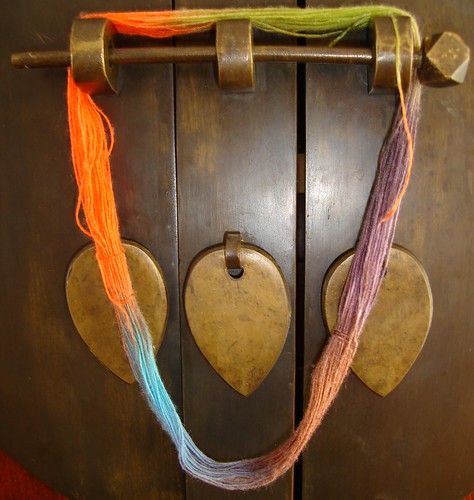
The yarn below (top left) is a single-ply silk yarn that I love. It's very fine, much like a heavy weight thread. I painted a small skein of it to see how it would turn out. The colours are not as bright on the silk as they are on a wool yarn, but I quite like the results.


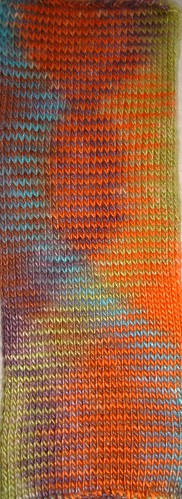
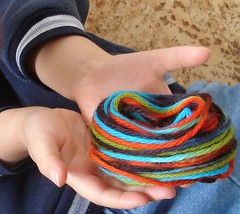
Here (bottom left) is a photo of the rolled silk yarn after it had been rinsed and dried. Above right is a small swatch (~2 x 6 inches) that I knitted up with it. I quite like the movement of colour from side to side across the swatch. I think this happened because the length of the individual colours painted onto the yarn was approximately the length needed to knit across one row of the swatch. The colours seem to shift a bit with each row so the end result is that several waves of colour seem to migrate back and forth across the swatch. Is this what's called pooling? Because I like it.

Flavours used:
  • The orange is orange
  • The green is lemon-lime
  • The blue is ice blue rasberry lemonade
  • The purple is grape

Here are the same colours painted onto wool:

rolledBall rolledBall


Here are the same colours on wool with a blast of tropical punch added to the mix:

yuyingSock


Additional links:
http://www.flickr.com/search/?q=koolaid+dye
http://www.ipomoea.org/emma/kadye/kadye.html
http://www.pburch.net/dyeing/FAQ/drinkmix.shtml
http://www.pburch.net/dyeing/fooddyes.shtml
http://www.thepiper.com/fiberart/koolaid/images/colorchart-max.jpg

5.27.2007

Sharing the Journey - Part II

Surface Design - painting, rusting, batik, printing and so on...

This is the second of a two part post listing blogs whose authors have kindly written tutorials about creating one-of-a-kind hand made fabrics. I will update this and my last post as I come across new tutorials.


Sonji Hunt of Sonji Says... has posted two generously illustrated fabric painting tutorials, Sonjified Fabric Painting and Another Fabric Painting Tutorial.

Alma Stoller also offers a great Fabric Painting Tutorial as well as instructions for doing Potato Starch Resist on fabric. Both are worth checking out.

Belinda Schneider of Bel's Nook reports on her Potato Starch Resist experiments here.

Neki Rivera of A Moveable Feast has just posted this gum arabic resist tutorial.

Katherine Munro, a silk painter, has posted the following tutorials on her website Dakini Silks: Direct Method, Resist Technique and Silk Screening.

Vicky Taylor-Hood has posted this list of fabric painting tips on her blog, Seastrands Studio. (Vicky also has a three part series titled "Some hints on beginning a landscape quilt.")

Interested in surface design for synthetic fabrics? Sharon Boggon of In a Minute Ago tells you how with her tutorial How to use transfer dyes to print on synthetic fabric.

Melissa of Fabric Dyeing 101 has created a video tutorial about something she calls sky painting in which she demonstrates painting cotton fabric with Procion MX fabric-reactive dyes and shaving creme to create one of a kind hand-dyed pieces. Watch the video and read the instructions here.

Dorothy Bowen has posted a twelve page article on doing batik using soy wax as a resist entitled "Soy Wax: An Alternative Resist." All the information you need is there. Then check out the PROCESS pages on her website where she gives an overview of her Batik on Cotton and Rozome on Silk (Japanese wax resist) work.

Rust dyeing is all the rage these days and it's easy to see why. Lois Jarvis appears to have a serious interest in the subject, check out her blog Rust-Tex and then visit her website of the same name. Lots of other folks are sharing their rust dye results: Françoise at Creatilfun, Luci F of Luci's Creative Adventures and Dianne at Magpies Envy.

Neither hip nor funky
posted this Freezer Paper T-shirt Tutorial and here's a Cheap screen printing tutorial for T-shirts written by Kristy at craftgrrl, both of which could presumably be applied to other types of fabric.

Beth Howard of Stitch Rip Repeat shows how to Print Your Very Own Fabric with simple homemade stamps.

newLooking for a new idea? Susie Monday of El Cielo Studio challenged herself to come up with 100 ways to “make a mark” on fabric. Her list is here.

If you know of other surface design for textile tutorial links, yours or someone else's that you'd like to see included here, please feel free to leave the information in the comments of this post. Thank you to the tutorial authors. And now to bed.

5.05.2007

Sharing the journey

Blogging about my creative work has helped me to feel less overwhelmed by what I am doing, and has also given me a sense of movement in a forward direction. What has been most useful to me is that, in writing about and photographing my work in progress, I see more clearly that some parts of the work come easily, even effortlessly, bringing great pleasure and sometimes a feeling of peace, while other parts intimidate me, and as a result I avoid doing them if I can. This has brought me squarely to the realization that I need to push myself to do more of what intimidates me, either by creating scaled down 'practice' pieces or otherwise approaching the work in a way that is less overwhelming but still allows me to grow both technically and creatively.

Since starting this blog I have also been in somewhat of a 'reading frenzy' of artist blogs. This has been both fun and a great learning experience. What has struck me most is the openness with which many authors share their work, thoughts and lives. In this and my next post I'll point to artists who openly share the way they make their one-of-a-kind hand made fabrics. I'll also update this post as I come across new tutorials.

Fabric Dyeing

Someone who shares a tremendous amount about how she makes her hand dyed fabrics is Melissa of Fabric Dyeing 101 who has documented everything she knows about fabric dyeing as well as the business side of things.

Melody Johnson, fabric dyer, art quilter, painter and teacher has a few posts at Fibermania about how she makes her hand dyes along with photos of the different processes she uses. You'll find a link to one of these in her sidebar titled "The Lazy Dyer". Hey I didn't know you could dye fabric like that! Or simply search her blog for the word "dye" to bring up more dyeing related posts loaded with photos, ideas and great tips.

Freida Anderson at A walk in the woods, walks you through her dyeing process with some nice photos to make everything crystal clear.

Sophie of Artstitches shares photos of her dye sessions on flickr. Sometimes all it takes is clicking on a blogger's flickr badge (you'll often find this in the sidebar of the blog) to find an endless stream of photos which visually document that person's work in progress. Once you've navigated to the blogger's main flickr page, also called their photostream, click on 'Tags' and choose whatever suits your fancy. In Sophie's case you'll find photos on "dyeing", "embroidery", "batik", "needlefelting", "weaving" and more. Yes, a picture is sometimes worth a thousand words (or at least a few hundred) as in this photo (among others) that Sophie posted on her flickr account and tagged "dyeing":
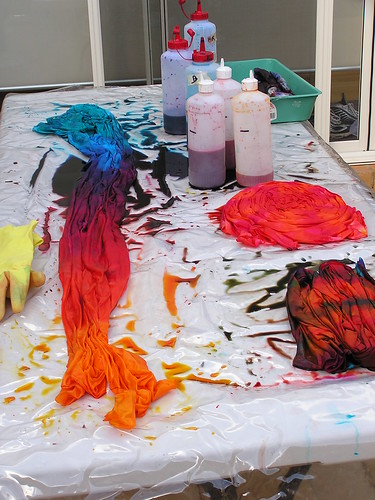

Hey I didn't know you could dye fabric like that! And since this photo also belongs to Sophie's Procion set, you know she's using fiber reactive dyes and probably cotton fabric. Try a search on her blog with the word "dye" to bring up her dyeing related posts.

Lisa Call puts a link to her tutorials for dyers under the Featured Posts heading in her side bar titled "How I Dye Fabric". It's an information rich post where she includes links to more handy information such as "An overview of my dyeing process", "Information on the fabric I use", and "Information on the dye and other chemicals I use and more on the process". It's all there for the taking. At her blog New Work and Inspiration Lisa has also been writing up a storm about her journey as a quilt artist. Her work is interesting and very bold. Her pieces have a lot of movement and high contrast as well as a ton of lines, which criss-cross and intersect, created first by her piecing and then echoed in the quilting that she lays down afterwards. Lisa made me laugh recently when she wrote 'Being an artist is very expensive.' I was actually hoping I could someday make a career of it. Smile.

Joyce Vance of elliebellie has written an article called Crackle Dye on Fabric on Paula Burch's website. It's a fully loaded tutorial with lots of great photos. Visit Joyce's website to see her textile, paper art and other unique creations.

Paula Burch's 'All About Hand Dyeing' pages are not to be missed. Here's a list of some of the other tutorials that you will find there:
L Carlene Raper's website Colorquilts has an entire section on the techniques she uses to create her cotton hand-dyes. Just click on the fabric dyeing techniques link in the sidebar. Also check out her studio archives where she documents how she creates her hand-dyes as well as her quilts and fiber sculptures.

Enjoy!

Shibori

Entwinements is the blog of Karren Brito who shares much of what she knows about the Japanese art of shibori. Karen's exquisite silk scarves, shawls, jackets and other art wearables are on view here. Her blog includes many tutorials sharing her craft, including: How an ENTWINEMENTS scarf is made (in 6 parts). For more tutorials click on Shibori technique in the Categories list in the blog sidebar. There's more than enough there to keep a dyer busy for several decades. All the tutorials come loaded with plenty of scrumptious photos.

glennisd has some nice shibori tutorials at Shibori Girl. Some are listed in the sidebar under Top Posts. glennis also started the flickr pool all things shibori, an evergrowing collection of work by shibori artists around the world. Her photographs of her own shibori work, like this one, are truly gorgeous.
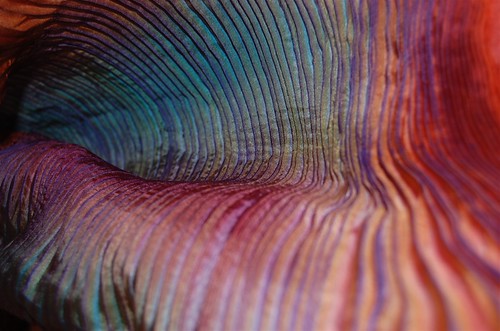
'shibori-oscopy'

Check her out on flickr. Shibori girl also links to the World Shibori Network where there is some good stuff under the headers 'technique' and 'world traditions'.

Tricia Mckellar
is a shibori artist with a digital twist. She is making some very unique and interesting quilts that she writes about on her blog NOTE 99. She outlines the process she uses to create her quilts under process & techniques in the 'Categories' sidebar.

If you know of links to other dyeing tutorials please feel free to leave the information in the comments of this post. Next time, I'll post about some other visual artists I've 'met' online who write about their journey and making their art.
2.28.2007

Signed up

For months now I have been eying a five day long dyeing workshop called True Colors: Developing a Personal Palette with Carol Soderland at Quilting by the Lake 2007. I finally took the plunge and registered yesterday. Now it's time to look around for a good deal on 30 yards of quilting cotton, and maybe a bit of linen... and just a bit of silk... and perhaps some rayon or bamboo fabric, just for the fun of it.

12.19.2006

It's comin' on Christmas

In our family at Christmas each person draws the name of one other family member and makes a gift for that person the following year for Christmas. A lot of great gifts have been offered; a chinese brush painting, a quilt, a wooden stool, a soapstone carving, photograph collages, mittens, a handmade clock, a spice rack, a sewing box. I'm not sure why but often when I see a piece of hand dyed fabric that I love, I imagine a crisp, cool, cotton dress shirt made out of it. This year I hand dyed some Pimatex Cotton and made one such a shirt for my Dad.


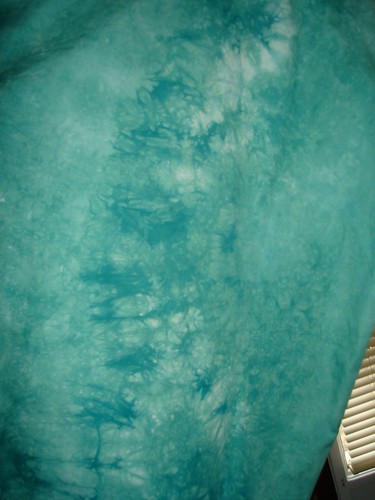
I used a low-water-immersion recipe: 50/50 ProChem PRO MX Basic Blue 400 2.0% OWG and ProChem PRO MX Grass Green 720N 2.0% OWG. I particularly like the mottled green and white markings that run down the back of the shirt like a spinal column. I think he'll like it. I just wonder who is going to iron it when it comes out of the dryer.

12.17.2006

Inspired

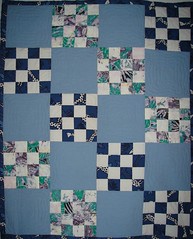
A year ago I pulled out a bunch of old quilt-tops I had made long ago and decided to quilt and finish them. I had recently bought a walking foot for my sewing machine and chose a blue and white baby quilt-top to start. I had never done any machine quilting before so I did mostly stitch-in-the-ditch with a tiny wee bit of free-motion quilting. Since then I've looked at lots of quilts online, in books, in museums and at shows and have been totally amazed and inspired by what I've seen. The very first quilt that blew me away was Changing Planes by Miriam Nathan-Roberts,


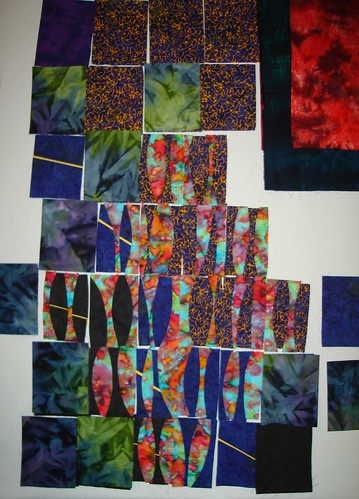
and the next time I was in a fabric store I looked around for some fabrics to create a gradation of colours from black to white. Five stores (and a few weeks) later I finally had what I thought was a good range of greys but they were all different weights of cottons and I didn't like that. At the same time I started to tune into what some quilters were saying about fabric dyeing: about getting exactly the colours they wanted and creating unique, one-of-a-kind fabrics for their quilting. I didn't see myself dyeing my own fabric (strange to say that now) but I started to notice that the quilts I loved, the ones that seemed to radiate light, that played with depth, colour and movement where usually pieced from hand-dyed fabric, hmmm... So, I started to pick up some pieces of hand dyed fabrics here and there, and the next time I started to work on a quilt I chose those fabrics almost exclusively. At the moment, it's here on my design wall,


and it's a whole lot different to the blue and white baby quilt top that had been sitting in a box for the past twelve some odd years.
Not really the same kind of movement and depth in this one.

Anyway, as so often happens, things occur by chance, and at about the same time my first issue of Fiber Arts Magazine arrived in the mail. Inside this excellent and scrumptious magazine I noticed an advertisement for a
Textile Surface Design Certificate offered at Haliburton School of the Arts in Haliburton, Ontario. And another undiscoverd, right-in-my-own-backyard kind of gem, thus revealed itself. This past summer I enrolled in a weeklong course there called Shibori Techniques with Marsha Gettas (after which I became completely and irreversably hooked on fabric dyeing).

What I loved most about it was the spontaneity and the non-deterministic nature of the process as well as the beauty of the peices that were created. Here is a piece that I did with acid-dye on a 8 mm China silk fat-quarter.


The name of the colour is chestnut brown, and the pattern is created by clamping with vinyl coated spring clips that look like this. They produce a surprising and complex pattern that I love and I can imagine a beautiful silk shirt made with this fabric. After that I learned how to do low-water-immersion dyeing in a four-hour class taught by Elaine Quehl, and have done a bit of vat-dyeing and gradation dyeing on my own. What's very wonderfully apparent is that there is no limit to what you can do with a pail and a sink, some inexpensive PDF cotton or silk and a few grams of dye. My intention is for this blog to become my online dyeing journal. I'm new to dyeing and completely new to blogging. I hope you'll stop by and say hello.